
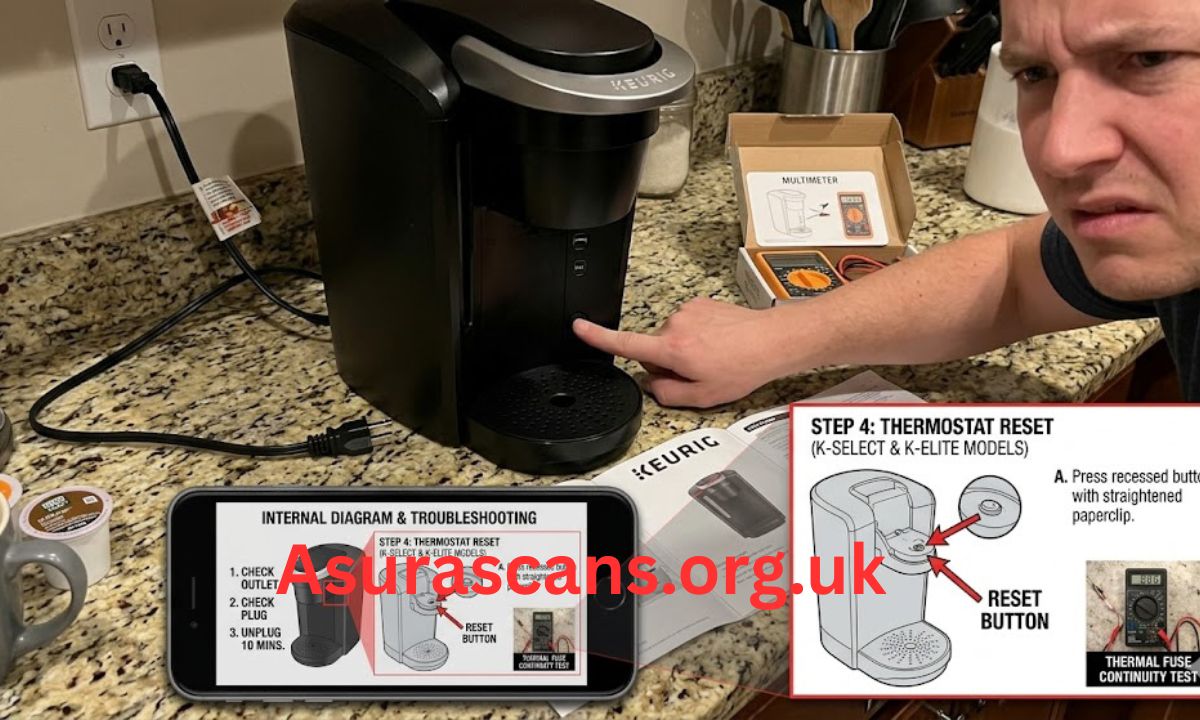
A Keurig coffee maker is usually simple to use, so it can feel frustrating when it suddenly refuses to power on. One day it brews normally, and the next day there are no lights, no sound, no heating, and no response from the power button. In many cases, the problem is not serious. It may come from a loose plug, a weak outlet, a tripped breaker, a power surge, a badly seated water reservoir, or a temporary internal error. Keurig’s own troubleshooting advice for a brewer that is not powering on starts with checking whether the machine is plugged in correctly and whether other appliances work in the same outlet. That means the first step is not to assume the machine is broken. Start with the simple things, move slowly, and avoid opening the machine unless you understand the risks.
First Check the Power Source
Before thinking about replacement, check the power connection carefully. Make sure the cord is pushed fully into the wall outlet and that the outlet itself is working. The easiest test is to unplug the Keurig and plug in another small appliance, such as a phone charger, lamp, or toaster. If the second device also does not work, the issue is likely with the outlet, breaker, switch, or power strip. Many kitchens have GFCI outlets, especially near sinks. These outlets can trip and cut power without warning. Look for the reset button on the outlet and press it firmly. Also check your home’s breaker panel if several outlets stopped working at the same time.
If your coffee maker is plugged into an extension cord, surge protector, or power strip, try plugging it directly into the wall. Coffee makers use heating elements, and some power strips may not provide steady power. A loose outlet can also cause the machine to appear dead. If the plug feels wobbly or falls out easily, use another outlet and avoid forcing the cord. Also inspect the cord for visible cuts, burn marks, melted areas, or damage near the plug. If the cord looks unsafe, do not use the brewer. Electrical damage should be handled carefully because water and electricity are a dangerous combination.
How Do I Reset My Keurig That Won’t Turn On?
To reset a Keurig that is not responding, unplug it from the wall and leave it unplugged for a few minutes. This gives the machine time to discharge and clear a temporary electrical fault. While it is unplugged, remove the water reservoir, empty it if needed, and place it back firmly. Then check that the lid, pod holder, drip tray, and reservoir are correctly seated. After waiting, plug the machine directly into a working wall outlet and press the power button. Some models may take a few seconds before the display or lights respond, so press the button once and wait rather than pressing it repeatedly.
If the brewer turns on after this reset, run a water-only cycle before making coffee. This helps confirm that the pump, heater, and controls are working normally. If the machine still does not respond, try another outlet that you already know works. If it powers on in a different outlet, the original outlet or circuit is the problem. If it does not power on anywhere, the machine may have an internal electrical issue, a failed power board, a damaged switch, or a deeper fault. At that point, it is better to check warranty options or contact support instead of opening the machine yourself.
Why Did My Keurig Suddenly Stop Working?
A Keurig can suddenly stop working for several reasons. The most common cause is a power interruption. A short power surge, tripped outlet, loose plug, or overloaded kitchen circuit can make the brewer shut off. Another common issue is mineral buildup. Over time, calcium and other minerals from water can collect inside the machine, especially if you use hard water. This usually causes brewing problems before total power failure, but heavy buildup can make the machine act strangely. Regular cleaning and descaling are important because mineral deposits can affect flow, heating, and long-term performance. Recent cleaning guidance from coffee experts and Keurig-related maintenance advice also emphasizes descaling and cleaning removable parts to prevent buildup and performance issues.
The machine may also stop working because the water reservoir is not seated correctly. Many Keurig models depend on sensors or proper alignment before operating. If the reservoir is slightly loose after cleaning or refilling, the brewer may not behave normally. A stuck button, dirty pod area, or lid that is not fully closed can also cause confusion. In older machines, normal wear can be the reason. Heating elements, pumps, seals, and electronic parts do not last forever. If your brewer has been used every day for years, sudden failure may simply mean one internal part reached the end of its life.
Does a Keurig Have a Reset Button?
Most Keurig coffee makers do not have a separate physical reset button like a router or some appliances. For many models, the reset process is done by unplugging the machine, waiting, checking removable parts, and plugging it back in. Some models have a power button, screen controls, or menu options, but that is not the same as a universal reset button. Because Keurig has many different models, the exact reset behavior can vary. A compact model, a K-Classic, a K-Elite, a K-Supreme, and a commercial brewer may not respond in exactly the same way.
If your model has a display screen, look for any message before unplugging it. It may show “Add Water,” “Descale,” or another alert. If the screen is completely blank, focus on power first. Do not assume the machine needs descaling if it has no power at all. Descaling helps when the brewer powers on but brews slowly, dispenses little water, or tastes off. A dead screen usually points more toward outlet, cord, control board, or internal power issues. If your machine is still under warranty, avoid taking it apart because that may void coverage.
Check the Water Reservoir and Internal Safety Signals
A water reservoir may seem unrelated to power, but it can still affect how the brewer behaves. Remove the tank and place it back into position firmly. Make sure it is not tilted, blocked, or sitting on coffee grounds. Check the small valve area at the bottom of the reservoir for debris. If the machine has been moved recently, cleaned deeply, or stored away, the reservoir may not be aligned correctly. Also make sure there is enough water in the tank. Some brewers may show lights or warnings when water is low, while others may appear unresponsive to users who expect brewing to begin immediately.
You should also check the pod holder area. Open and close the handle firmly but gently. Remove any used pod. Look for stuck foil, coffee grounds, or broken plastic pieces. Never put your fingers near the sharp needle carelessly. If the pod holder is dirty, wipe the area after unplugging the machine. A machine that was working yesterday may fail today because a small part is not seated correctly. Simple cleaning and reseating often solve problems that look more serious than they are.
What Is the Average Life Expectancy of a Keurig?
The average life expectancy of a Keurig is often around three to five years for regular home use, although some machines last longer and some fail earlier. Lifespan depends on water quality, cleaning routine, daily usage, model type, storage conditions, and how carefully the machine is handled. A household that brews one or two cups per day may get more life from the machine than an office or busy family that brews many cups daily. Some coffee-care sources estimate about three to five years for typical use, while another recent coffee-machine lifespan guide gives a similar range of about four to five years with daily use and proper maintenance.
Maintenance makes a big difference. Descaling on schedule, using clean water, emptying the reservoir when the machine will not be used for a while, and wiping the pod area can help prevent problems. If your brewer is older and has already shown warning signs, such as weak brewing, repeated shutoffs, unusual noises, slow heating, or frequent error messages, a no-power issue may be part of a bigger decline. Repair may not always be worth it for a low-cost home model, especially if the machine is out of warranty and replacement parts are expensive.
When Cleaning and Descaling Can Help
Cleaning is useful when the machine powers on but does not brew properly. If the brewer is completely dead, cleaning alone will not fix the electrical problem. However, if the machine turns on after a reset but behaves badly, cleaning should be your next step. Remove the drip tray, pod holder, and water reservoir if your model allows it. Wash removable parts with warm soapy water, rinse well, and dry them. Wipe the outside of the brewer and clean around the needle area carefully. Then run several plain water cycles to clear residue.
Descaling removes mineral buildup inside the water lines. If your brewer says “Descale,” brews slowly, gives only half a cup, or makes loud pumping sounds, mineral buildup may be restricting water flow. Use a proper descaling solution or the method recommended for your specific model. Always follow the machine’s instructions because different models may have different steps. After descaling, run enough fresh water cycles so the next coffee does not taste sour or chemical-like. Good cleaning habits may not bring a dead machine back to life, but they can prevent many future problems once power is restored.
When You Should Stop Troubleshooting
Stop troubleshooting if you smell burning plastic, see smoke, notice sparks, find a melted cord, or feel heat around the plug when the machine is off. These are safety warnings, not normal coffee maker problems. Also stop if water has leaked heavily into the base of the machine. Unplug it immediately and let it dry only as a safety step, not as a guaranteed repair. Do not open the bottom panel or internal casing unless you are qualified to work with electrical appliances. A coffee maker contains wiring, heating components, and water pathways, which can be risky together.
If your brewer is new, check the warranty before doing anything advanced. If it is old and out of warranty, compare the cost of repair with the cost of a replacement. For many home users, replacing an older unit is more practical than paying for electrical repair. But if the issue is only an outlet, GFCI reset, loose reservoir, or temporary internal glitch, you may be able to fix it in minutes without spending anything.
Final Thoughts
When a Keurig Won’t Turn On, start with the basics: outlet, plug, breaker, GFCI reset, power strip, cord condition, and reservoir placement. Then perform a simple reset by unplugging the brewer, waiting, reseating removable parts, and plugging it directly into a working wall outlet. If it comes back on, run a water-only cycle and clean the machine before normal use. If it remains completely dead on multiple working outlets, the problem is likely internal and may require warranty support or replacement. A calm step-by-step approach saves time, avoids unnecessary panic, and helps you know whether your coffee maker needs a simple reset or has truly reached the end of its useful life.